Download:
PS3 Theme Builder 3.0
3.0 Upgrade (From v2.5, 5.32 MB)
Download:
PS3 Theme Builder 2.5 Full Install (12.22 MB)
Download: Sample Theme Files (2.0 MB)
Download: Updated p3tcompiler (Includes 2.40 sample theme files, 5.0
5.0 MB)
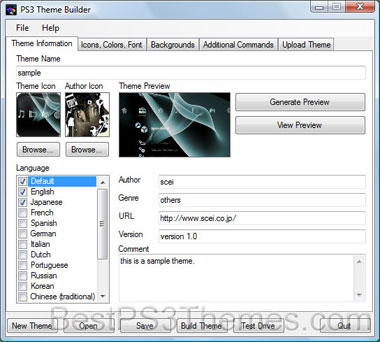
Open up
PS3 Theme Builder and click New Theme (Ctrl + N). A window will pop up like the one below:
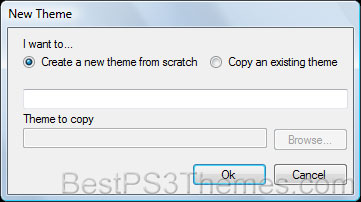
Choose either “Create a new theme from scratch” or “Copy an existing theme” and enter the theme name in the field below. This is what the theme file will be saved as.
Selecting “Copy an existing theme” will duplicate the theme .XML file you browse for (such as sample.xml contained in the sample theme files from above).
For this tutorial, select “Create a new theme from scratch” and name it whatever you want. Click Ok.
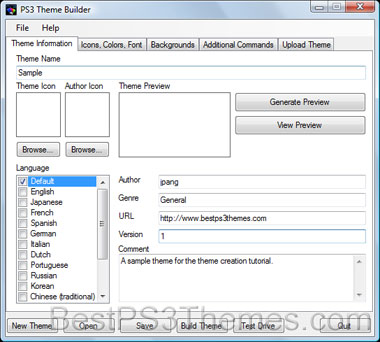
Afterwards, it should look like this:
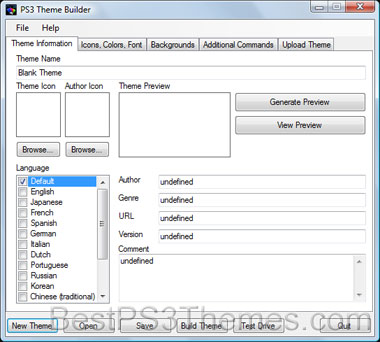
* In Theme Name at the top, enter the name of the theme again. This is the name that will appear on the PS3
* For Author, enter your name (who credit should be given to)
* For Genre, enter the type of theme (Abstract/Art/Design, Cars/Transportation, Games, etc.)
* For URL, enter a website
* For Version, put the version of the theme
* In the comment field, enter a description for the theme
Leave Default checked for the Language part. If you want your theme to support multiple languages, select and check any other languages and enter the above information again. If the theme only supports one language, leave only Default checked.
Here’s an example of what it should look like now:
(Please don’t name your theme sample!)
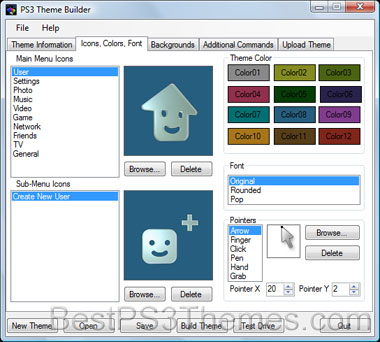
Now switch to the Icons, Colors, Fonts tab on topon top.
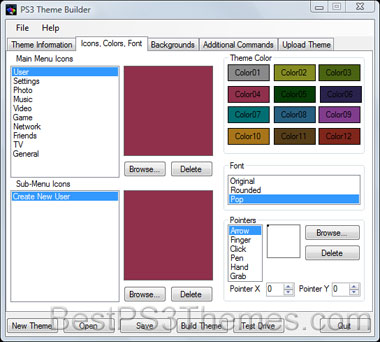
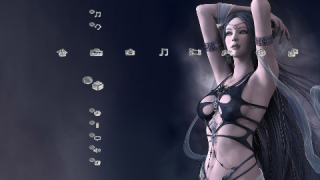
* After you have created or downloaded some icons, you will have to match them up with the corresponding icon. Which icon is which is pretty self-explanatoryself-explanatory. Any icon left blank will appear as the original one. Icons must be 128×128 pixels in PNG 32-bit format.
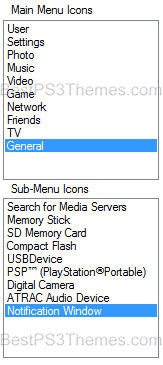
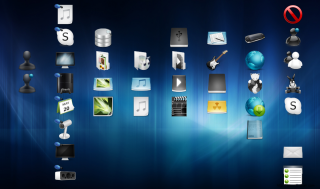
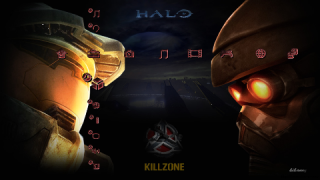
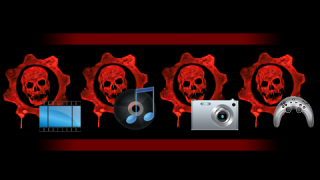
Main Menu icons:
Sub-Menu icons:
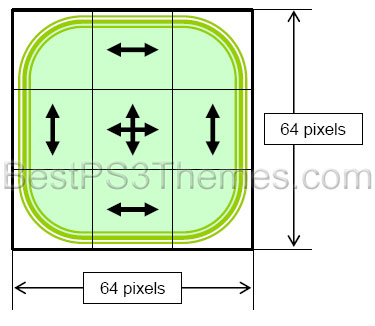
* The frame of the notification window that is displayed at the upper right section of the screen when you receive a message, sign in/sign out, etc., can also be customized.
* The size of the notification window will change depending on what’s being displayed inside. Use the below image to help prepare your notification window. Image must be 64×64 pixels in PNG 32-bit format.
* For Theme Color, click the color that you want to appear when no wallpaper is set (default wave). Brown (color 11) is shown above.
* For Font, choose between Original, Rounded, or Pop
* For each of the pointers (optional), browse for a custom pointer icon. Pointers must be 48×48 pixels in PNG 32-bit format. Then adjust the Pointer X andX and Pointer Y coordinates to that the black square lines up with the tip of the arrow.
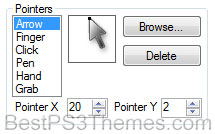
* There are six pointer states:
o Arrow – Normal state
o Finger – On an object that can be clicked
o Click – Clicking
o Pen – On an object where text can be inputted
o Hand – On an object that can be dragged
o Grab – Dragging
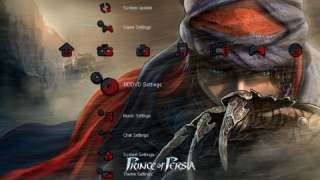
When you’re done with this part, here’s another example of what it should look like:
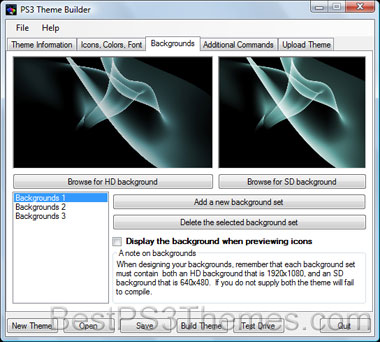
Switch to the Backgrounds tab, you’re almost done.

* Click “Add a new background set” for however many backgrounds you want. You can have up to 16. If you have no backgrounds, the default wave will be shown. When there are multiple background images, images will switch randomly.
* After you add your background sets, click “Browse for HD background” and select the wallpaper you wish to use.
* Do the same for “Browse for SD background”
* Repeat the above two steps for each background set you added
For each background imagebackground image, both an HD resolution and SD resolution background is required. The appropriate image sizes are as follows:
* For HD resolution: 1920×10801920×1080
* For SD resolution: 640×480640×480
Images must be in JPEG format, under 1 MB otherwise the background may not appear.
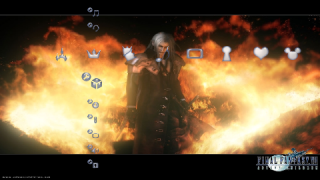
Here’s an example of it now (3 background sets shown):
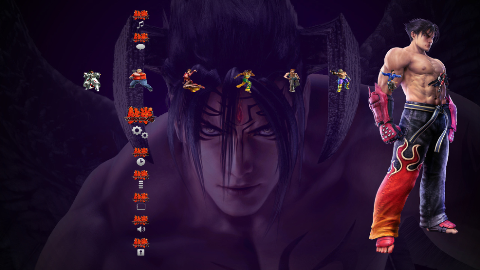
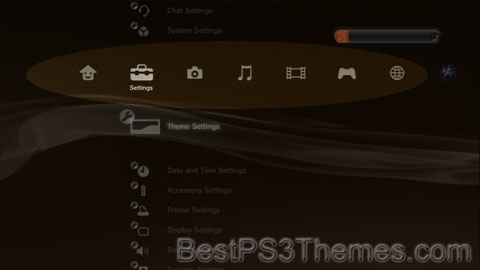
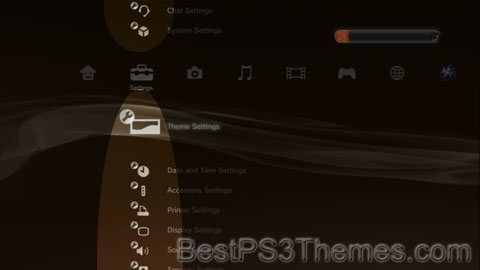
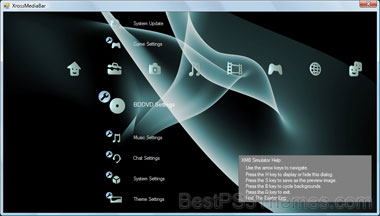
To make sure the icons and backgrounds are correct, click the Test Drive button at the bottomat the bottom to simulate the PS3 XMB. A window like this will pop up.
Switch back to the Theme Information tab when you’re done test driving it.
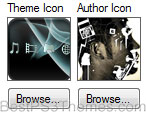
* Under Theme Icon, browse for a theme icon. This is the icon that will appear in front of the name before you select the theme on the PS3.
* Additionally, you may supply an Author Icon (optional). This will appear when viewing theme information on the PS3.Example:
* Next, click Generate Preview. A window like this should pop up:
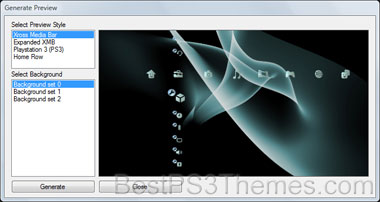
Then select the preview style you want to appear in the preview image. Choose between Xross Media Bar, Expanded XMB, Playstation 3 (PS3), or Home Row. The image on the right side of the window will give you an idea of what each style looks like.
If you’re using backgrounds, select the background set that you want to appear in the preview. Now click Generate at the bottom.
Another window should pop up:
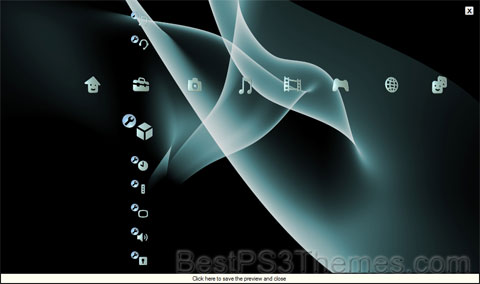
Click the bottom where it says, “Click here to save the preview and close.” The window will close and bring you back to the Generate Preview window. Close this one, too.
Now you should be back at the Theme Information tab. Save the theme, then click Build Theme at the bottom.
If all goes well it should say
done.
Press key...
Congratulations, the theme is now complete! Open up the PS3ThemeBuilderV2.13 folder, then go to the Themes folder. Open up the next folder (It should be the name of your theme) and inside there will be a .p3t file (the PS3 theme file).
You will need to install this theme to your PS3.
Installing PS3 Themes
Downloading using a PC
1. Download the theme you want from (Where ever you get your themes from)
2. Prepare a storage media such as a Memory Stick Duo or a USB device.
3. Use a PC to create a folder named “PS3″ (without the quotes) on the storage media and create a subfolder named “THEME” (must be all uppercase, again, without the quotes) within that folder.
4. Copy the theme you downloaded (.p3t) to the “THEME” subfolder on the storage media.
5. Insert the storage media in the PS3 system.
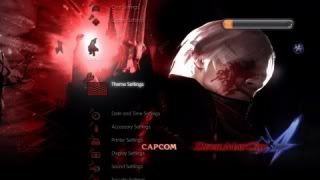
6. In the XMB (Xross Media Bar), go to  (Settings) >
  (Theme Settings) > [Theme], and then select [Install].
7. Select the theme that was saved on the storage media. Note: The theme name may be different than the actual theme.
After installation has been completed, go to (Settings) > (Theme Settings) > [Theme] again, and then select the theme.
Downloading using a PS3 (Not sure if its only certain sites or not. Ill test and see)
1. Go to (Where ever you get your themes from) on the PS3’s Internet Browser.
2. Download the theme you want to install. The file will be saved to the hard disk.
3. Go to (Settings) > (Theme Settings) > [Theme] to select the theme file that was saved on the hard disk.
4. Select [Apply].
Changing the background while keeping custom icons
This is if you like the icons but don’t like the theme’s background(s) or want a different wallpaper
1. Go to (Settings) > (Theme Settings) > [Background]
2. Select [Original] to display the PS3 wave (no background)
3. Select [Wallpaper] to display a wallpaper of your choice
4. Select [Theme Name] to use the background(s) from the theme
Changing background brightness
If a theme has a whitea white or bright background, it may be hard to see the XMB text
1. Go to (Settings) > (Theme Settings) > [Background] > [Brightness]
2. Select the desired brightness (-1, -2, -3, -4, or -5)
Read More....


 k
k